How do artists use nature as a basis to inspire artistic
design?
What are diatoms, where can they be found in local
ecosystems, and how are they a useful tool for both artists and ecologists?
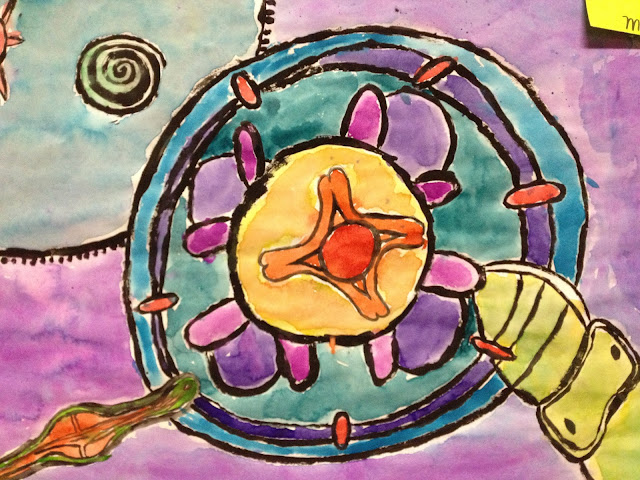
For the past few weeks, my 5th graders and I have been on a super interesting journey into the microscopic, yet gorgeous world of diatoms. If you don't know what a diatom is, don't feel discouraged! I had no idea what a diatom was either until I discovered the amazing bio drawings of Ernst Haeckel just last year. In short, diatoms are microscopic, single-celled organisms that live in aquatic environments. Diatoms are encased in beautiful, iridescent cases that grow in elaborate bilateral and radially symmetrical shapes. Plant and animal cells are a major part of the 5th grade curriculum that the students were covering this Fall, so the choice the pair watercolor painting techniques with diatoms ended up being a smash hit!
Objectives: The
students will…
·
understand how the invention of the compound
lens microscope advanced the field of botanical drawing and allowed artists and
scientists to view the microscopic structural details of objects from nature.
·
relate 2-D design principals such as shape,
repetition, and symmetry to the naturally occurring organic forms found in
microscopic diatoms.
On the first day of our diatom unit, I placed a picture showcasing a
variety of diatoms under a microscope on each table. As the students
waited in their line outside of my door I told them they would have 2o
seconds to examine the photograph, talk with their table mates, and come
up with an idea of what they thought was depicted in the photo. The
student guesses ranged from "pillows from Pier1 Imports" to Willy Wonka
candy, to bacteria. I gave a brief overview of what diatoms are, that
they are found in aquatic environments, that they evolved in the
Jurassic Period, and that they are used in several household products
such as toothpaste! After the introduction, I explained to students that
we were going to do our best to draw very large-scale. (We used 18 X 24
inch paper) We were going to take something microscopic and enlarge its
scale by 10,000! I demonstrated how to draw the diatom by looking for
familiar shapes like triangles and circles and patterns. I emphasized
starting on the inside of the form and working out since most of the
diatoms have radial symmetry. I stressed drawing so large that the
diatom goes off part of the page. I also encouraged students to spice up
their composition by having some of the diatom forms overlap. After the
students were satisfied with their drawing they went over the lines
with black acrylic paint.

On day two of the diatom unit, I showed students how to paint using the wet on wet watercolor technique. The classes went crazy over this new skill! They loved how the paints "exploded" when they hit the page and the watery result of this technique worked well conceptually for the diatom's watery environment.
The students got very experimental with the watercolor painting. One student even recalled the splatter technique used in Japanese suminagashi paper making that we used a few projects back and begin to try this method with watercolor paints. He got some really interesting results which inspired other students to give it a try. I like to make a big deal over connections like this that the students make. I told him he was really thinking like an artist -- being innovative within the parameters to create a new result.
It took one additional 45 minute class for the students to finish their diatoms. The students were so excited about this project that they got really into coming up with names for our exhibit. In the end it was a toss-up between a lot of really cool ideas including "Jingle Cells," and "Tie-Diatoms." Ultimately, we decided to go with "Deck the Halls with Diatoms." Did I mention what an extraordinary group of 5th graders I have the pleasure of working with each day? This project was a boat-load of fun.


