Wednesday, October 31, 2012

Project Runway: Art Teacher Edition


Today I finally got to unveil my "Persistence of Memory" costume. It was, for the most part, a success though I did have a few Kindergarteners who I passed the in hallway ask me if I was going as a banana tree!?  My 5th and 6th graders recognized the iconic artwork so it was a good opportunity to teach them a few things about Salvador Dali and Surrealism. A fourth grader suggested I should have worn a Dali-esque glue mustache to complete the look.  C'est bonne idee, mon ami!
So I found out that sewing a garment is super hard. I tried my best to harness the spirit of Demetri from last season's Project Runway and bit of the shutspa of fellow art teacher blogger/vintage textile artist, Cassie Stephans, but oh my, a seamstress I am not. 
I think I had the most fun building and painting the puffy sculptural clocks. I do like sewing free-form objects, but as for the dress I was quite afraid I was going to bust a seam reaching down to pick up paper scraps! It was a wild day, as Halloween days at school usually are. Here's to you, Salvador Dali, you are too cool.


Monday, October 29, 2012

Chihuly Melted Sculptures


Hurricane Sandy provided me with enough gusto (and time!) to unearth this project from my computer archives. I did this project with a 4th grade group LAST SPRING and never got to post about it. I thought the bright colors would be a nice contrast to one dreary, spooky half-day of school.

To kick this lesson off, we watched this great clip that shows detailed footage of Dale Chihuly's creative process. CBS News correspondent, Erica Hill,  gets to fulfill her life dream of blowing some glass with the glass master himself. As they watched, I asked the 4th graders to take note of just how many artists work together to make one piece of glass. Dale leads and gives direction, but there are individual artists in charge of each step of melting, twirling, twisting, cracking, and cooling. They seemed to get a kick out of the amount of effort and teamwork that goes into each piece.

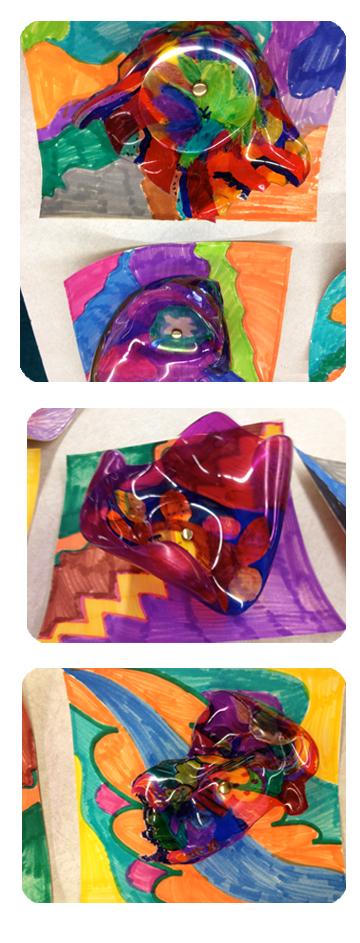
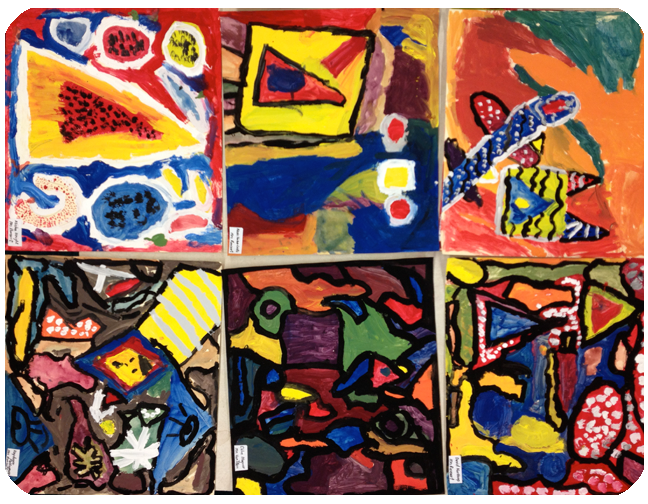
I purchased a boatload of Shrinky-Dink transparent sheets from my local JoAnn's Fabric. They cost about $6.00 for a pack of 12. I cut each sheet into two sections and on day one, after we watched the video, the students worked with permanent marker to draw a unique design on the plastic surface. They also were in charge of cutting a unique edge around the perimeter of their plastic piece. I told them to be bold with their cuts and be open to what the heat will do to their project. This is what their projects looked like at the end of class.


Between class one and two, I took the student projects home and got to melting! I used recycled Diet Dr. Pepper cans as a molding form and heated my oven up to a low temp of about 275 degrees. The aluminum can created a place for the plastic to "slump" and droop once it was heated enough. This is what my plastic set-up looked like. I admit, it was pretty precarious and the potential to over melt a project was high.

And after about seven seconds in the oven, they looked like this!
It is really important not to leave the plastic in the oven for more than ten seconds. If you do, THE PLASTIC WILL DO ITS JOB AND SHRINK SO MUCH YOU NEED A MAGNIFYING GLASS TO FIND IT! (Ok, not really that small, but it will be so miniature the designs will be to small to appreciate.)

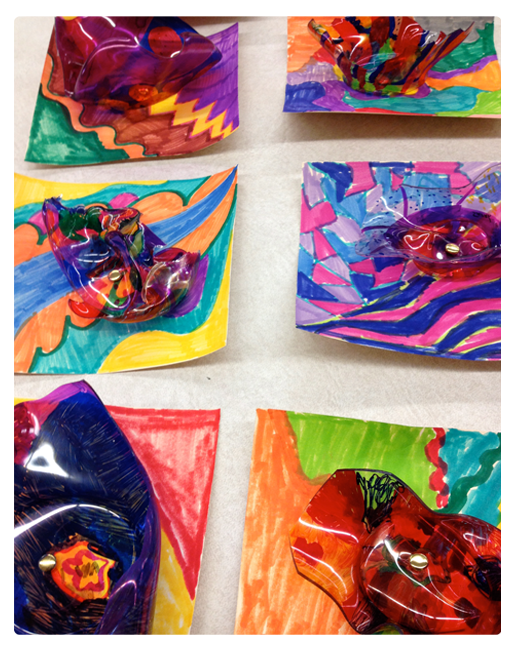
When the kids got their melted shrunken plastic back they were very intrigued with how the heat transformed their work. They designed a background square and we used brass brads to connect the plastic to the background so the work could be shown on a bulletin board. Here are the finished pieces in all of their 3-D glory!


Wednesday, October 24, 2012

Colossal 3-D Masks


    4th grade just finished the most amazing project just in time for some proper masquerading. I found the idea (and confidence!) from this lesson posted by Phyl over at There's A Dragon in My Classroom. I've done 3-D masks before but never on such a large scale. It turned out to be a great way to use up all of the old, neglected semi wrinkled paper from the time I cleaned out my messy paper closet earlier this school year. I put together a Powerpoint with over 100 masks from around the world which I kept on a constant rotation on the first day when students conceptualized their mask designs. We started with 18 x 24 super sturdy oaktag to cut out a symmetrical outer edge. We used scrap paper to cover the oaktag on the second day. During the end of day 2, artists made two cuts and the very top and bottom of their masks and I came around with a stapler and 3-D-ified their designs. On the final day we added symmetrical details and as Phyl suggested, we painted our masks with a clear coat of "glue stew" (a mixture of two parts glue and 1 part water.) This project was an uber hit. Many of the artists made special designs to enhance their Halloween costumes. It is nice when the kids go home with something LARGE, eye-catching, and functional to boot!


Wednesday, October 17, 2012

Impromtu Bookfair Mural

"Many hands make light work!" --Jean Heyden

Last week two sensational moms came up to visit the art room. They were involved in organizing the school's book fair which is happening this week and they were wondering if the art room might lend a hand to help advertise and build excitement for the literary mega-event. Of course, we were delighted to chip in! We set to work and in two days we were able to make a billboard-sized, show stopping mural that is "gi-mungous!" Deadlines usually give me the howling fantods, but this time the brisk pace that this project required inspired some truly spontaneous painting and it was just downright fun! The kids love book fair week and were psyched to have a chance to promote the cause with their brushstrokes!


Thursday, October 11, 2012

Little Artist Costumes

My "Persistence of Memory" fabric via Spoonflower fabric finally arrived in the mail today! I can't wait for the weekend to get here already so I can set to work on pulling my costume together.

Apparently I'm not the only one using modern art as inspiration for my Halloween costume.

I found these "Little Artist Costumes" over at Oh Happy Day blog. Aren't these hysterical? I have never gotten stronger son or daughter pangs than when I found these sweetly sophisticated trick-or-treaters! You better believe my offspring will be rocking Dali mustaches by the time they are out of diapers!


Thursday, October 4, 2012

Color, Shape, & Line Designs


 Can you believe one project can cover primary colors, secondary colors, geometric shapes, organic shapes, line, AND pattern? This project is full of juicy art elements and principles and was really fun to do as a beginning of the year review.

I couldn't resist playing this video for my students to get the ball rolling for this lesson on color mixing. The song is so catchy, OK Go is super arty and creative as a band, and stop animation is beyond mesmerizing for artists of all ages!


"The are three primary colors, And lots of other colors out there too. But when you're seeing any other color, they are all made up of red, yellow, and blue."
What a beautiful lyric! 


This is what my visual board looked like. I confess, I downright stole the idea for this geometric/organic shape poster design from Mrs. Impey over at Art Room 104 because I think it is just the coolest ever! The poster definitely helped the students distinguish between the two shape categories. One student pointed out that the organic shapes reminded him of the watery designs in the Spongebob Squarepants television show which I thought was a pretty accurate observation.

This is what our paintings looked like after two days work. On the first meeting day we drew ten geometric shapes and painted them using only primary colors. On the second day we filled in the space between our geometrics with organics shapes. These shapes were painted in the secondaries which were hand mixed on a palette. I enjoyed seeing the 3rd graders utilize the color wheel as a tool to look up all the color recipes that they forgot. They are really making progress at becoming independent problem solvers. It made me feel immensely proud of them.


On the third and final day of work the students worked with black and white paint to outline all of their shapes and add patterns where they saw fit. My favorite thing about this project is the variety of responses it inspires. Way to hit it out of the park, 3rd grade!